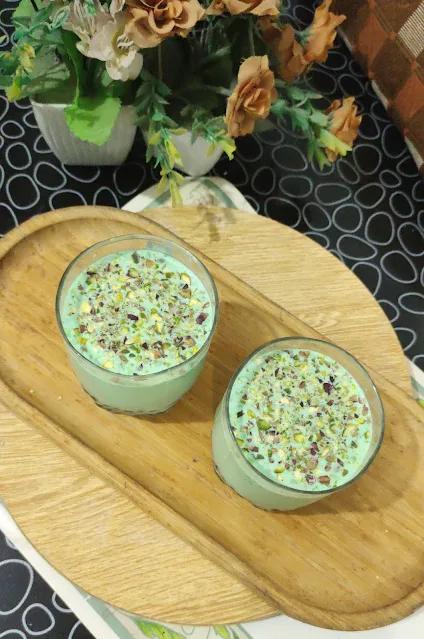
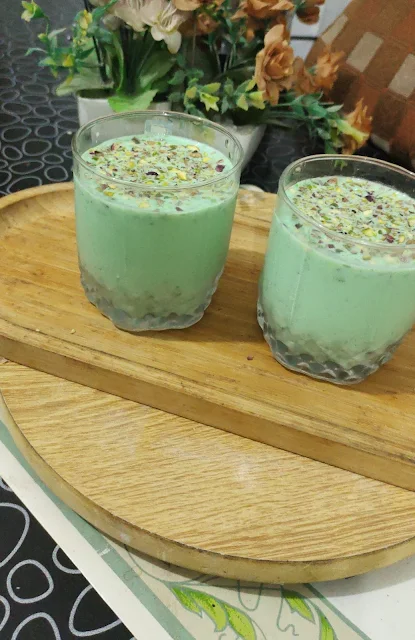
Pistachio Milk Drink || Pistachio Milkshake || How to make pistachio milk drink with step-by-step photos and video
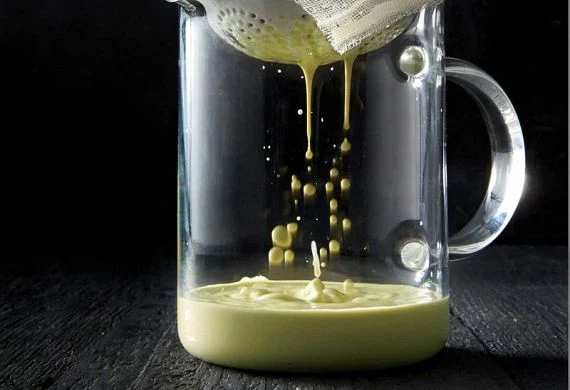
When I think of pistachio milk, nothing can compare with the freshness, nutrition, and taste of the milk we can make at home with fresh raw nuts and seeds! Moreover, I prefer to make my own pistachio milk, since it’s super easy and the relative cost is much lower compared to the store-bought plant-based milk.
This time I decided to make my own pistachio milk, and to be sincere, I was quite reluctant at the beginning since I had never tasted something similar. Of course, I love pistachios,
their texture is rich and creamy, it has a mildly sweet and somehow exotic taste, while their aftertaste brings to mind freshly cut pistachios. In addition, ingredients such as khoya and almond powder can be used as a cream instead of cashew nuts instead of them.
My Latest Pistachio Milkshake Video...
Pistachio Milk is a healthy drink. The pistachios give it a lovely green tinge and are ideal for kids and parties.
Well, as I often make it at home and enjoy drinking, whenever I find myself tired and exhausted would like to have it for a warm-up for the next level, so you also try once
the go-ahead, know how to make a tasty and healthy drink
If you have tried this Pistachio Milk Drink, don’t forget to rate the recipe. You can also follow me on social media to see what’s latest in my kitchen!
Facebook
Instagram
Pinterest
Youtube
Like Our Videos? Then do follow and subscribe to us on YouTube to get the latest Recipe Video updates.
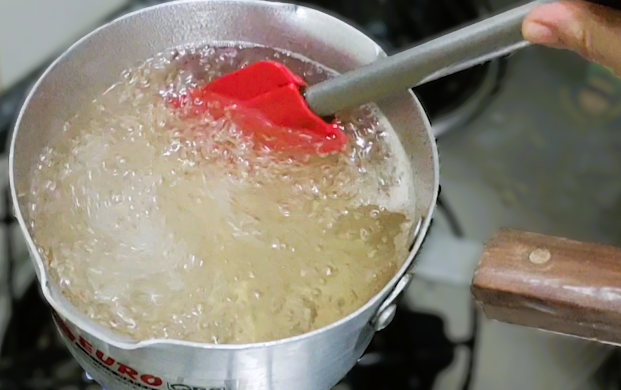
Boil the milk with cardamom powder in a pan over a medium flame.
Add sugar, khoya, pistachio, and almond powder.r Mix it well, and keep stirring until well combined.
Remove from the flame and let it cool down completely. Once cooled then transfer to the serving jug and keep in the fridge to chill.l
To serve, sprinkle some crushed almonds and pistachios on the milk glass.
Keri Ka Sharbat Recipe || Unripe Mango
Drink || Summer Drink With
Step by Step Photos And Video.
Keri ka sharbat, also known as Unripe Mango Drink, is a refreshing beverage made from keri, or unripe green mangoes, sugar, and spices. It is
popular in India and Pakistan and serves as an effective remedy for preventing heat stroke and sunstroke during the summer.
Unripe mango drink is also rich in vitamin C and
iron. Keri keri, or kacha aam, refers to unripe or
raw green mangoes in India and Pakistan. These raw green mangoes are commonly
eaten as a snack and are a popular ingredient in Indian and Pakistani cuisine
due to their unique sour flavor.
What is Keri Ka Sharbat?
Unripe Mango drink, also known as
keri sharbat, is a refreshing drink made from unripe green mangoes, sugar, and
spices. It has a unique tart flavor due to the use of raw mangoes and black
salt (or kala namak). "Kairi" refers to unripe green mangoes, while
"aam" means mango, which is why this drink is sometimes called keri panha, keri sharbat, or aam panna interchangeably.
This drink is typically
prepared in the form of a squash or concentrate, with water and ice cubes added
when serving. Not only is it delicious, but it is also an effective remedy to
help prevent heat exhaustion and sunstroke during the hot summer months.
Raw mangoes are rich in vitamin
C and iron and possess cooling properties. Additionally, roasted cumin aids
digestion, while black salt helps replenish sodium chloride lost through
excessive sweating in the summer heat.
For a detailed recipe, watch my video where I explain
the steps one by one.
My Latest Keri Ka Sharbat Video:
Main Ingredients Of Keri Sharbat:
Green Unripe Mango:
Green, unripe mangoes are the main ingredient
in this drink recipe. They are also known as raw mangoes or keri. This type of
hard, raw mango is ideal for making keri ka sharbat and is easily found at
Indian markets.
Pakistani and Asian grocery stores during the appropriate season.
Kairi, or green mangoes, typically start to become available about
1 to 1.5 months before the main mango season.
Granulated sugar:
Sugar is the second main ingredient in this
drink recipe. This recipe uses white granulated sugar, but you can also
substitute it with brown sugar or jaggery (gurr).
The amount of sugar should match the quantity
of unripe green mango. If the raw mango is more tart than sweet, feel free to
increase the sugar. Sugar acts not only as a sweetener but also as a
preservative.
Lemon Juice:
I add fresh lemon juice to prevent the squash
from crystallizing while it is stored in the refrigerator. Although many people
don’t include lemon juice in this recipe,
I highly recommend that you don’t
skip or omit it. The lemon juice will keep the keri ka sharbat pourable, even
after being stored in the fridge.
Black Salt:
Black salt, also known as kala
namak, is a popular ingredient in Indian and Pakistani cuisine. It is typically
sprinkled over sliced fruits, added to fruit chaat, or used in drinks to impart
a smoky, tangy flavor.
You can purchase black salt at
Indian and Pakistani grocery stores, and it has recently gained popularity in
health stores as a staple in vegan cooking. If you can't find black salt, you
can substitute it with half the amount of regular salt. Alternatively, you can
use peri peri salt or Tajín seasoning in your recipes.
Food color:
I added green food coloring to
this keri ka sharbat to make it brighter and more tempting. You can also add
yellow food coloring or skip this ingredient altogether, as it is optional.
Mango essence:
Adding
a few drops of mango essence makes the squash aromatic, similar to store-bought
squash. It's an optional ingredient, so you can skip it if you don't have any.
You might like
this:
Mango lassi
Mix apple
and carrot juice
watermelon
punch drink
cold coffee
Creamy
Mango Milkshake
Have you tried Keri ka sharbat? Feel
free to follow me on social media to stay up-to-date on my latest culinary
creations.
Facebook
Instagram
Pinterest
Youtube
Like Our Videos? Then do follow and subscribe to us on YouTube to get the latest Recipe Video updates.
How to Make Keri Ka
Sharbat?
Step 1:
Start by peeling the raw mangoes. This method makes it
easier to separate the pulp from the mango seeds. If you boil the mangoes with
the skin on, the skin and pulp can mix together, making separation difficult.
Make 3-4 long gashes on each mango to ensure they boil quickly inside.
In a pot, boil water and add the prepared mangoes. Cook for about 30 minutes or
until they are soft.
2nd Step:In a saucepan, combine 0.5 liters of water and sugar. Stir continuously, adding fresh lemon juice to
prevent crystallization. Once the mixture starts to boil, turn off the flame.
You do not need a one or two-thread sugar syrup for this recipe.
3rd step:
Once the raw mangoes are
soft, remove the seeds from the pulp.
Blend the pulp in a grinder or with a
hand blender until smooth.
Strain the blended pulp using a strainer or muslin cloth to remove any remaining fibers.
4th step:In a separate pot, combine
the sugar syrup with the strained mango pulp. Stir well and bring to a boil.
Then, add mango essence, black salt, and food coloring, mixing thoroughly.
Cover the pot with a lid and let it cook until the mixture thickens.
To check the consistency, touch the mixture with two fingers; if a thread forms, the syrup is ready. Turn off the flame and let the sharbat cool completely.
Once cooled, transfer the
sharbat to an airtight glass container and store it in the refrigerator. This Keri ka sharbat can last for more than six months.
To serve, add 2-3
tablespoons of keri ka sharbat to a glass, along with water and ice cubes. Mix
well and enjoy!
Creamy
Mango Shake || Mango Milkshake || How to make Mango Shake with step-by-step photos
and video
Mango Milkshake is a creamy, delicious, and mouthwatering refreshing drink. Mango milkshake is
the perfect drink to enjoy when mangoes are at their peak of the season.
This milkshake is
prepared by simply blending mango chunks and mixing with heavy cream and sugar
syrup. Here I would like to tell you I added an additional ingredient, heavy cream, to
bring a rich, creamy flavor to the shake
For the best result, follow my detailed step-by-step photo
instructions video below.w
You can make variations:
This mango shake recipe
is made by simply blending chopped ripe and sweet mangoes with dairy milk and
cream. But there are several ways to customize your drink with different
ingredients.
My Latest Video: Creamy Mango Milkshake:
Cream: When you add some heavy cream to any shake, you get an extra-thick and creamy consistency. Whipped cream can be added to top the
milkshake before serving.g
Whole milk: Whole milk or full-fat milk gives the richest-tasting shake. However, feel free to add low-fat or skimmed milk if you prefer
Ice cream: While blending, adding vanilla ice cream or
mango ice cream will definitely make your mango shake thick, creamy, and more
flavourful. Mango and vanilla ice cream are the best types of ice cream to
include in this mango milkshake recipe.
Ice-cubes: To thin the milkshake considerably, add 8-10 ice
cubes while blending or mixing so that the milkshake is cold when it is served…
Tips to make the Best Milkshake:
Mangoes:
Be careful
to choose mangoes. Any variety of mangoes can be used, but I suggest avoiding
the mangoes that are too fibrous. I also prefer using since, aam, or
choose. Which are the best for making delicious mango shakes, as their pulp is so
sweet and smooth instead of fibrous? Also, avoid using sour or semi-sweet
mangoes. It can cause stomach aches. Sour mangoes also curdle the milk and
cream.m
Milk:
As mentioned, you can use whole milk or low-fat skim milk. However, avoid using milk powder, as it doesn’t work as well as fresh milk or Tatra milk packs. Using powdered milk means compromising the taste of the shak.e
Sweeteners:
Using very sweet mangoes, then do not
need to add any extra sugar or sweeteners to the milkshake. If not quite sweet
enough, feel free to add sugar, maple syrup, or honey while mixing or blending.
Cream:
Use good brand heavy cream or fresh cream; both
are best for bringing rich, creamy flavor to a milkshake.
Combine
the mango chunks in the blender and blend to a smooth puree.
Transfer the mango puree to another bowl.
Next, add
heavy cream.m
And
sugar syrup
Stir to combine very well
Transfer into the jug and pour chilled milk along with crushed ice.
With crushed ice
Mix very well until everything is incorporated.d
The creamy mango shake is ready to serve
Chilled, serve and enjoy!
//o?$("#menu-wrapper").css({position:"fixed",top:0,left:0,right:0,"z-index":99}):$("#menu-wrapper").css({position:"relative"})};n(),$(window).scroll(function(){n()})});
// Menu 2
$(document).ready(function(){var str=location.href.toLowerCase();$('.mainin-nav ul li a').each(function(){if(str.indexOf(this.href.toLowerCase())>-1){$("li.highlight").removeClass("highlight");$(this).parent().addClass("highlight")}})})
$(function(){var pull=$('#pull');menu=$('.mainin-nav ul');menuHeight=menu.height();$(pull).on('click',function(e){e.preventDefault();menu.slideToggle()});$(window).resize(function(){var w=$(window).width();if(w>320&&menu.is(':hidden')){menu.removeAttr('style')}})});
// Back to Top
$(function(){$("#back-to-top").backToTop()});
!function(n){n.fn.backToTop=function(o){var c=n(this);c.hide().click(function(){n("body, html").animate({scrollTop:"0px"})});var i=n(window);return i.scroll(function(){i.scrollTop()>0?c.fadeIn():c.fadeOut()}),this}}(jQuery);
// Tab Menu
!function(a){"use strict";var b=function(b,c){var d=this;d.element=b,d.$element=a(b),d.tabs=d.$element.children(),d.options=a.extend({},a.fn.mtabs.defaults,c),d.current_tab=0,d.init()};b.prototype={init:function(){var a=this;a.tabs.length&&(a.build(),a.buildTabMenu())},build:function(){var b=this,c=b.options,d=c.tab_text_el,e=c.container_class;b.tab_names=[],b.$wrapper=b.$element.wrapInner('
').find("."+e),b.tabs.wrapAll('
'),b.tabs.each(function(c,e){var f,g=a(e),h=d;f=g.find(h).filter(":first").hide().text(),b.tab_names.push(f)}),a.isFunction(c.onReady)&&c.onReady.call(b.element)},buildTabMenu:function(){for(var b,c=this,d=c.options,e=d.tabsmenu_el,f=c.tab_names,g="<"+e+' class="'+d.tabsmenu_class+'">',h=0,i=f.length,j=function(){var a=arguments;return d.tmpl.tabsmenu_tab.replace(/\{[0-9]\}/g,function(b){var c=Number(b.replace(/\D/g,""));return a[c]||""})};i>h;h++)g+=j(h+1,f[h]);g+="",c.$tabs_menu=a(g).prependTo(c.$wrapper),b=c.$tabs_menu.find(":first")[0].nodeName.toLowerCase(),c.$tabs_menu.on("click",b,function(b){var d=a(this),e=d.index();c.show(e),b.preventDefault()}).find(":first").trigger("click")},show:function(b){var c=this,d=c.options,e=d.active_tab_class;c.tabs.hide().filter(":eq("+b+")").show(),c.$tabs_menu.children().removeClass(e).filter(":eq("+b+")").addClass(e),a.isFunction(d.onTabSelect)&&b!==c.current_tab&&d.onTabSelect.call(c.element,b),c.current_tab=b},destroy:function(){var a=this,b=a.options.tab_text_el;a.$tabs_menu.remove(),a.tabs.unwrap().unwrap(),a.tabs.removeAttr("style"),a.tabs.children(b+":first").removeAttr("style"),a.$element.removeData("mtabs")}},a.fn.mtabs=function(c,d){return this.each(function(){var e,f=a(this),g=f.data("mtabs");e="object"==typeof c&&c,g||f.data("mtabs",g=new b(this,e)),"string"==typeof c&&g[c](d)})},a.fn.mtabs.defaults={container_class:"tabs",tabs_container_class:"tab-contents",active_tab_class:"active-tab",tab_text_el:"h1, h2, h3, h4, h5, h6",tabsmenu_class:"tabs-menu",tabsmenu_el:"ul",tmpl:{tabsmenu_tab:'
{1}'},onTabSelect:null}}(window.jQuery,window,document);
//]]>

