Yummy Traditional

Sofyani Biryani Recipe

                                                 
sofyani-biryani-recipe-with-step-by-step-photos

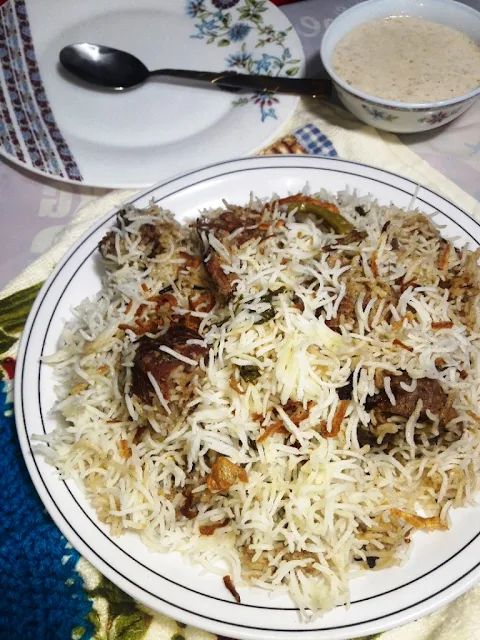
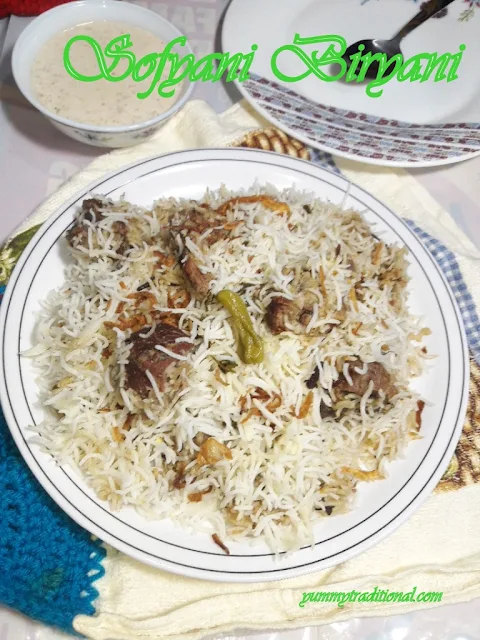
Sofyani Biryani | Mutton White Biryani || How to make sofyani biryani with step-by-step photos


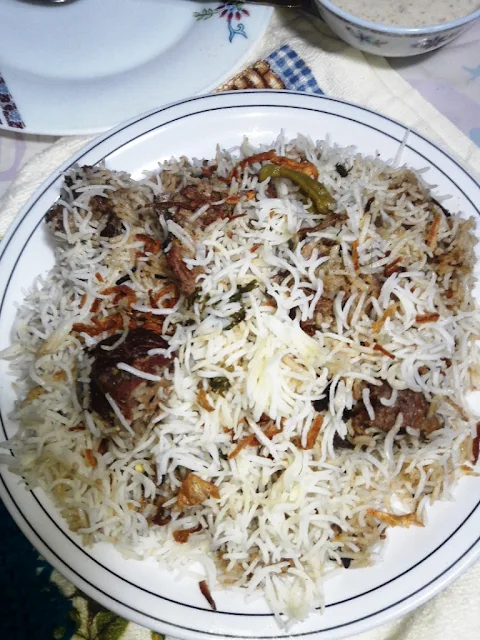
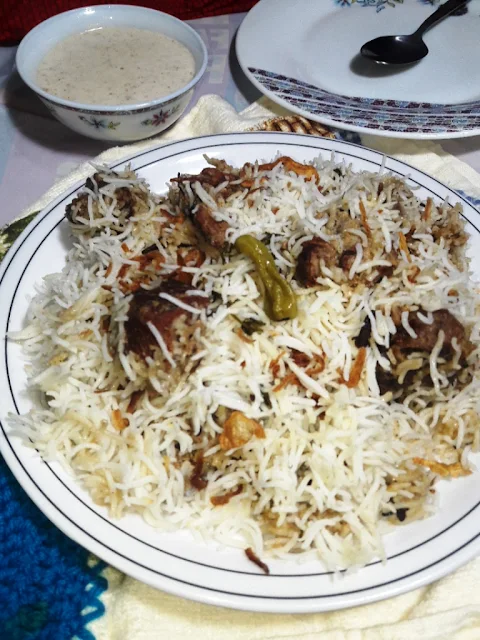
Mutton white biryani is a delicious,mild-spiced, mouth-watering layered white rice dish. made with marinated flavored mutton with mint and coriander leaves.

This recipe originated from the kitchens of the Nizams. It was cooked on special occasions and is known for its aroma and white color.


If you go by the original Sofiyani Biryani Recipe, it’s a completely white biryani delicately cooked with almond paste, milk, cream, and yogurt without the usage of any powdered spices especially red chili powder or turmeric powder Rather than green chilies and black pepper powder are used to spike up the heat and whole spices are used for the aromatics. And no saffron.

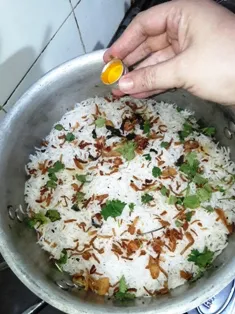
Toward the end, I drizzled some biryani essence to enhance the aroma but this is totally optional.


sofyani-biryani-recipe

This white biryani can be prepared with any type of meat like chicken, beef, or lamb. the rest of the recipe methods will remain the same. if you are using chicken meat then no need for a long time of marination just 15 minutes is enough


For the best result follow my detailed step-by-step photo instructions and tips above the recipe card


Recipe notes:

Rice: Choose aged premium  quality  rice as it cooks up to fluffy long grains, Soaking the rice and cook it in surplus water to get rid of starch and keep the grains non-sticky


Marination: long time marination makes the meat soft, tender, and juicy. also, the meat absorbs the flavor just 2 hours of marination is sufficient no need to add papaya to the beef just giving it a proper marination time is good enough for making tender meat


sofyani-biryani


Layering biryani: In this recipe, I just made two layers one of which is mutton and the other is rice on top. but you can make 2 or 3 layers of rice as desired. The most important instruction is to use a large capacity pot as your rice won’t be mushy or sticky to each other


Biryani essence/kewra don’t skip biryani essence or kewra as this ingredient brings in that unique aroma. a few drops of kewra or biryani essence can make super aromatic biryani 


For more Biryani recipes:

Chicken biryani

Sindhi biryani

Egg biryani

Chicken dum biryani

Bombay biryani

Beef biryani

Fish biryani

Zafrani mutton biryani

Keema masoor biryani


If you have tried this Sofyani Biryani then don’t forget to rate the recipe. You can also follow me on social media

Facebook

Instagram

Pinterest

Youtube


youtube

Like Our Videos? Then do follow and subscribe to us on YouTube to get the latest Recipe Video updates.


sofyani-biryani


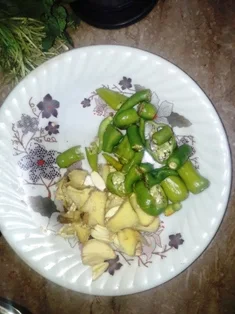
To begin this recipe first chop green chilies, ginger, and garlic coarsely 


chop-ginger-garlic-chillies

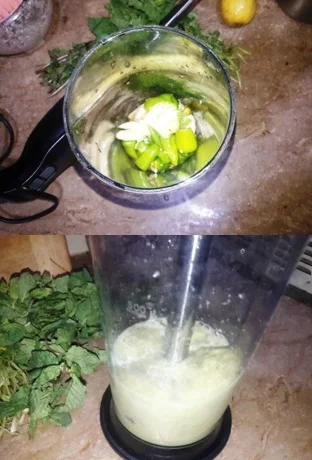
Then in a blender put chopped green chilies and ginger-garlic with a little water. and blend it into a smooth paste keep it aside


blend-masala

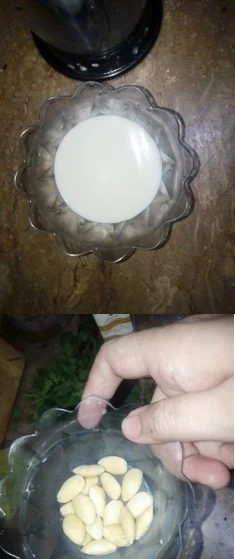
Take milk and peeled almond 


take-peeled-almonds-and-milk

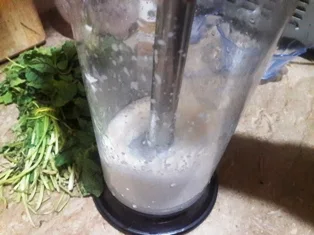
Then blend almond with milk  to a fine paste


make-almond-paste

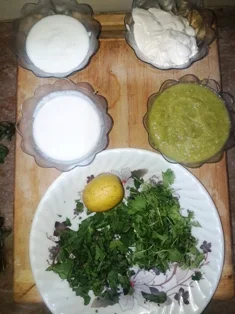
Prepare all ingredients that are going to be marinated


make-paste


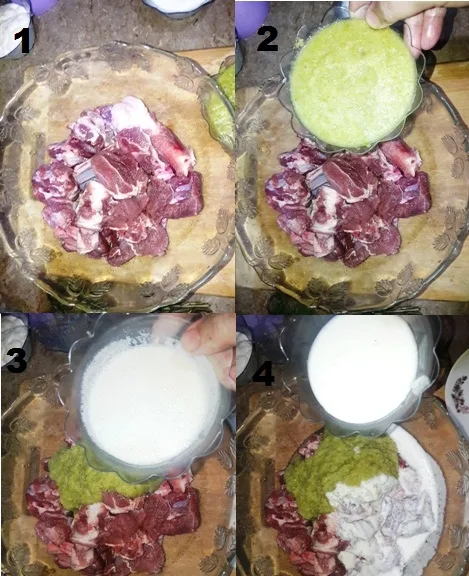
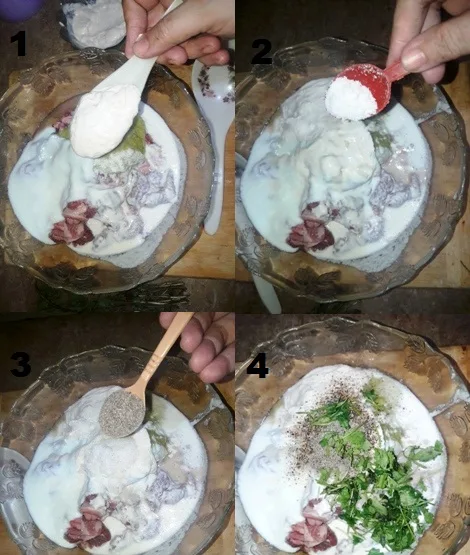
Rinse the mutton under the running water and put it into a mixing bowl, Next, add green chili paste, almond paste, yogurt


marinate-meat

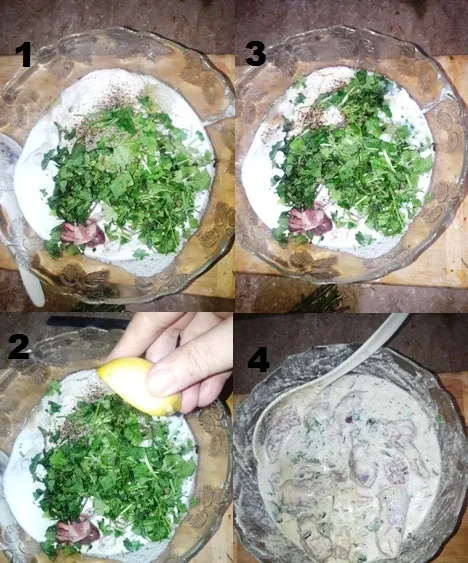
Add cream, salt, black pepper powder, coriander, and mint leaves


add-cream-salt-pepper-to-the-meat

Add lemon juice, and mix everything well


mix-everything-in-meat

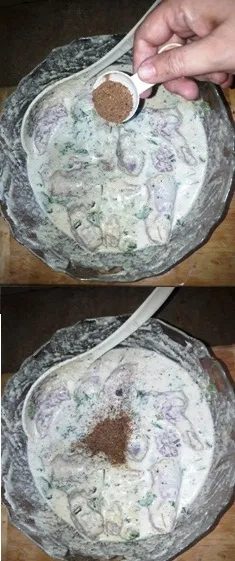
Towards the end add the gram masala powder and mix well 


add-garam-masala

And refrigerate for 2 hours 


refrigerate-them


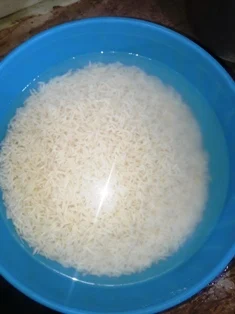
Wash basmati rice well until the water runs clear, and soak it for at least 3o minutes to 40 minutes 

               
wash-rice-and-soak

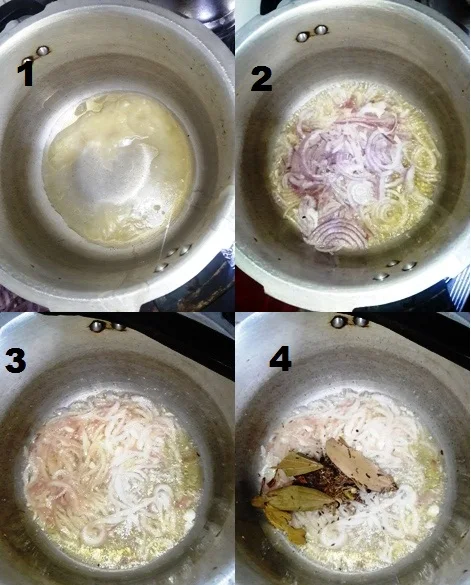
After 2 hours heat the ghee in the pressure cooker/pan add onion, and sautรฉ them for 3-4 minutes or until translucent, add whole spices 


add-ghee-and-fry-onion

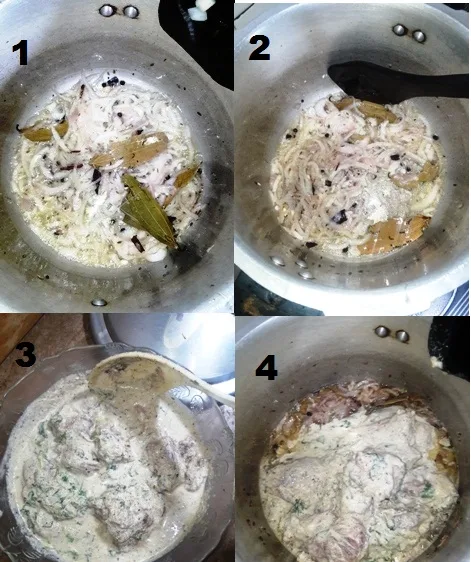
And fry them with onion for a minute, Before putting the marinated mutton into the pot stir well again


saute-onion-and-add-marinated-meat


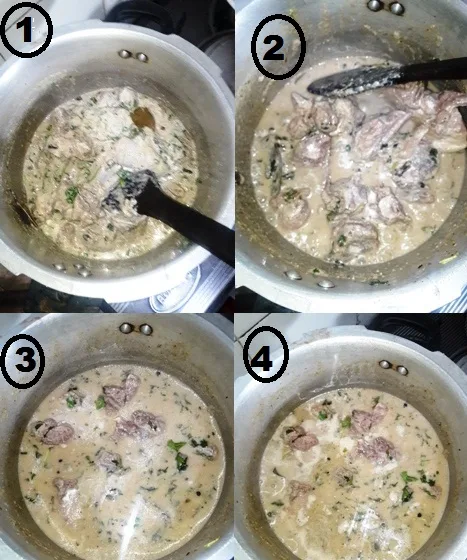
Fry them with onion and spices for 5-6 minutes on medium flame, Pour water into the mutton and let it come to the boil


cook-mutton

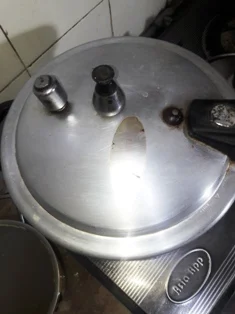
Close the cooker's lid and cook for around 15 minutes on medium heat after whistling. I used a pressure cooker while you can use a pot


close-the-lid

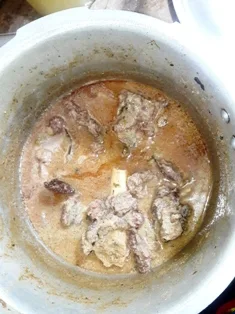
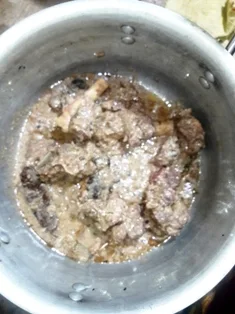
After 15 minutes let the pressure release naturally, then open the lid and check if the water quantity is more continue to cook on the high flame until the moisture is almost evaporated and a thick gravy is left


mutton-is-cooked

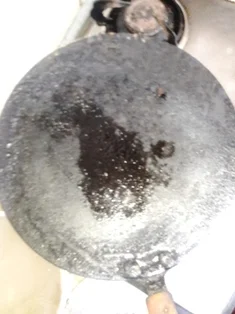
Preheat the heavy iron Tawa 


heavy-botton-skillet

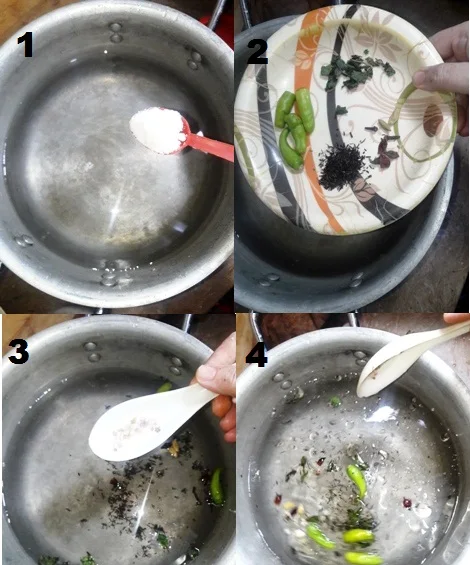
Bring water to a boil in a large pot by adding green chilies, shah jeera, cloves, green cardamom, star anise, mint leaves, salt white vinegar, and oil


boil-the-water-for-spices

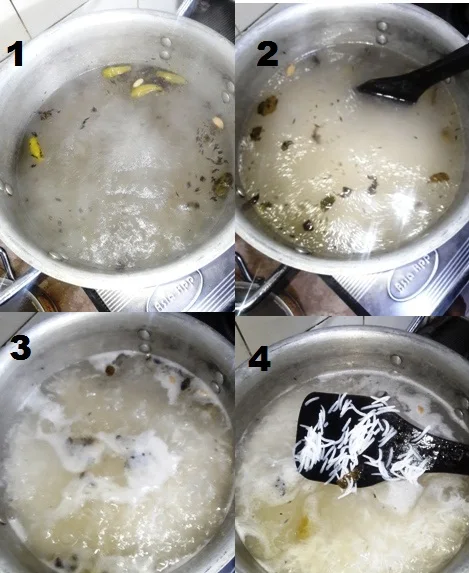
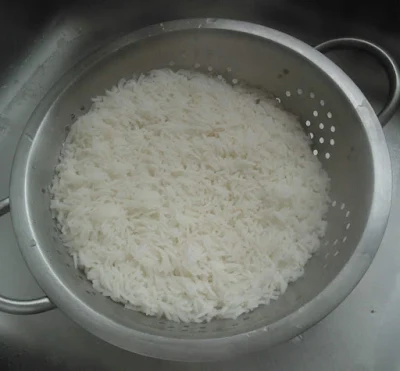
Add the drained rice into the water, Cook until 90% done on a medium flame. The rice will be al-dente at this stage and you will feel the bite if eaten but almost done


boil-rice-till-90%-done


When done drain it into a colander 

             
drain-the-rice

Layer the mutton masala at the bottom of the pot using the same pot in which we have boiled the rice


layer-the-meat

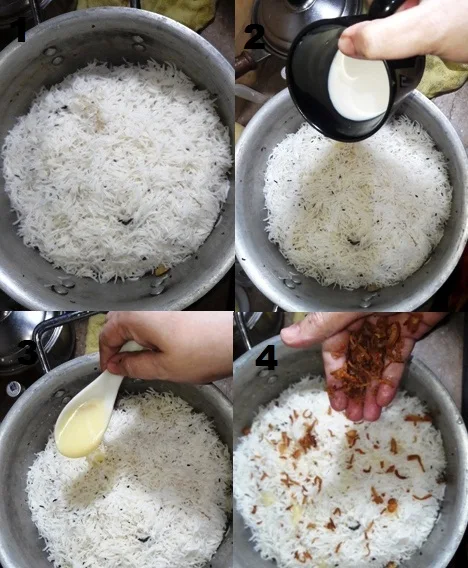
Next layer rice on top of the mutton masala. Pour a little warm milk, ghee 


lay-the-second-layer-of-rice-on-top-of-mutton

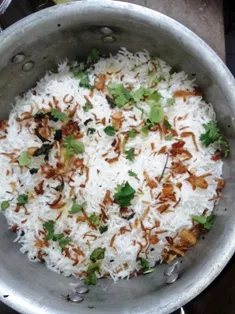
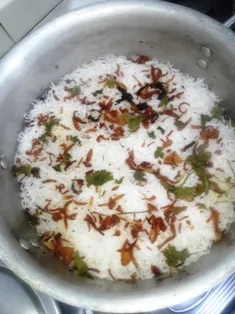
Sprinkle the brown onion and coriander 


sprinkle-brown-onion-over-rice

Add a few drops of biryani essence


add-essence

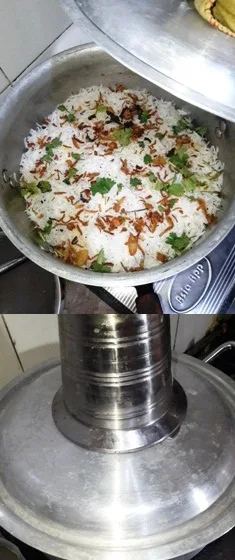
Cover the pot with the lid and keep the heavy object over the lid so that steam can be sealed within the pot

Simmer the rice first 5-8 minutes on a high flame. And then on low heat for 10 minutes


seal-the-biryani


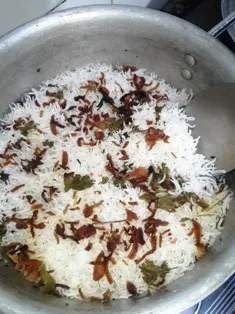
You can insert a skewer or a long spoon into the base and check if it is still very moist, You must get the grease, not moisture. As seen it is still very wet. seal it and put it back on the stove for a few more minutes, Seal back and allow it to rest for another 10 minutes


check-the-rice

Sofyani biryani is done. allow a bit to cool down. otherwise, biryani rice may be broken up. fluff the rice up


fluff-the-rice-up

And transfer to the serving tray/plate


transfer-the-rice-onto-plate

Serve sofyani biryani with raita
                   
serve-biryani-with-raita


mutton-white-biryani


Anda Bun Kabab Recipe

                                                 
anda-bun-kabab-recipee-with-step-by-step-photos


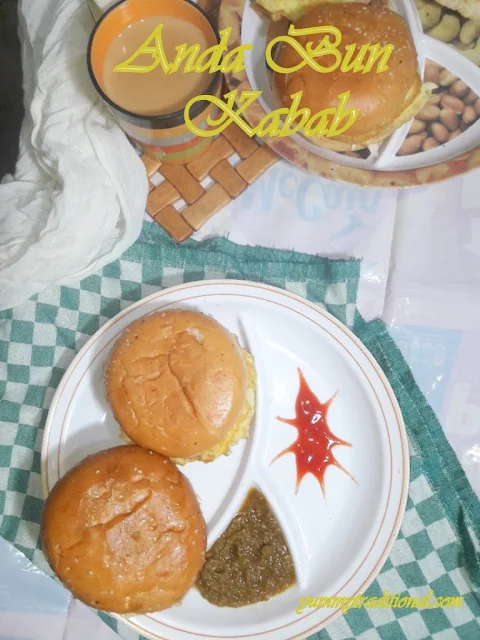
Anda Bun Kabab | Dal Anda Bun Kabab || How to make anda bun kabab with step-by-step photos


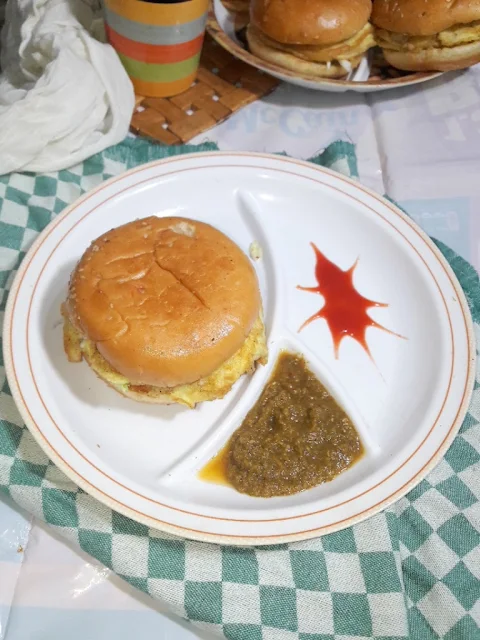
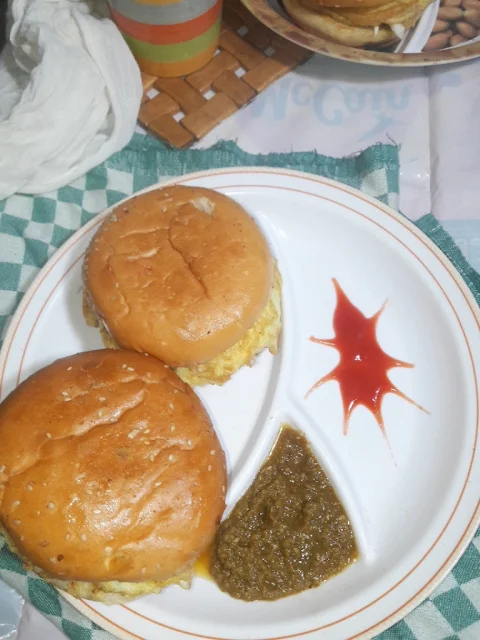
Anda Bun Kabab is an extremely delicious and popular street snack, It originated in the streets of Karachi as fast food that is cheap and affordable even by a common man where you would find a bun Kabab seller on every other street.


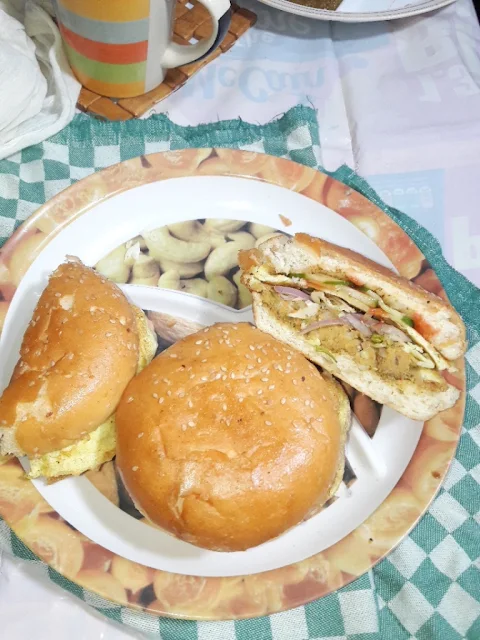
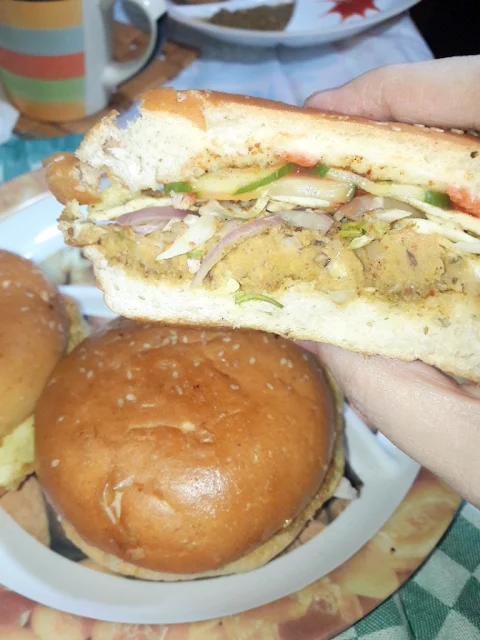
This anda bun kabab is made with dal kabab, bun burger, chutney, egg, and salad, A quite common and relish snack that you would like to eat ever


I made dal kabab in this recipe is made with bangle gram,ginger-garlic, onion, and some other basic whole spices, also use dal kabab with dal chawal or paratha as well as bun kabab chutney recipe 


I have already shared it in my previous recipe. Your Bun burger recipe also you will also be on my blog, you can use store-bought bun burgers as well


anda-bun-kabab


This delightful Main Course recipe of dal anda Kay Ban Kabab can be ready in approximately 30 minutes and is good to serve around 2-4 People.

For the best result follow my detailed step-by-step photo instructions and tips


Recipe notes:   

  1. Dal kabab: be careful to cooking the chana dal, don’t add too much water that loses the shape of the kababs and turns soggy
  2. I just poured 1 ½ cup water into the one-and-a-half cup bangle gram
  3. Eggs: beating well eggs is a must in this recipe, I used an electric beater if you can beat the egg with a hand whisker you can use a hand whisker
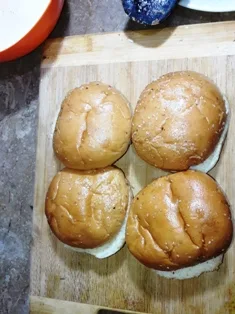
  4. Bun Burgers: I used fresh store-bought burgers due to less time, either you can follow my bun burger recipe, or can be bought from the store. but use only fresh buns, stale buns can spoil the taste of a bun
  5.  Salad: I added cucumber, cabbage, and onion in a bun kabab, you can add veggies of your choice like lettuce, parsley, tomato sliced, etc
  6. Ketchup: using chili garlic ketchup can enhance the taste of your anda bun, plain tomato ketchup also can be used instead of chili garlic ketchup

                                
anda-bun-kabab-recipe


  1. Butter: toasting bun slices in a bit amount of butter brings a buttery taste to bun kabab. that feels superb in taste
  2. Mayonnaise: if you prefer mayonnaise used in bun kababs and not even any health issues then can be used, although I skipped this ingredient since I don’t like bun kababs
  3. Bun kabab chutney: I applied chutney directly to the buns without mixing yogurt, whereas you can mix some yogurt with chutney using raita chutney in bun kababs. it will enhance the taste of the bun kabab
  4. Omelet: I fried some of the omelets from leftover beaten eggs, if you have no egg left after frying the kababs, do not worry at all make a regular omelet by using another one ๐Ÿ˜‰
For more similar recipes:

Mutton cheeseburgers

Kaleji bun

Zinger burger

Shami bun kababs

Chapli kabab burger

                       
bun-kabab

If you have tried this Anda Bun Kabab, don’t forget to rate the recipe. You can also follow me on social media

Facebook

Instagram

Pinterest

Youtube


Like Our Videos? Then follow and subscribe to us on YouTube for the latest Recipe Video updates.

                       
anda bun kabab


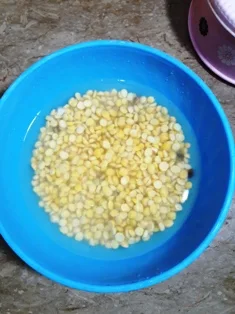
To begin this recipe firstly soak chana dal in warm water for an hour


soak-chana-dal

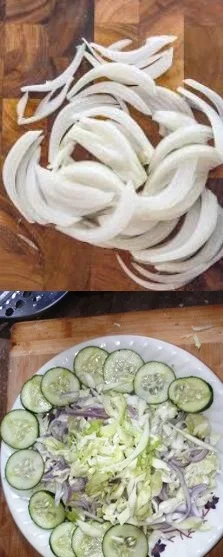
Take all veggies and prepare them all 


prepare-all-veggies


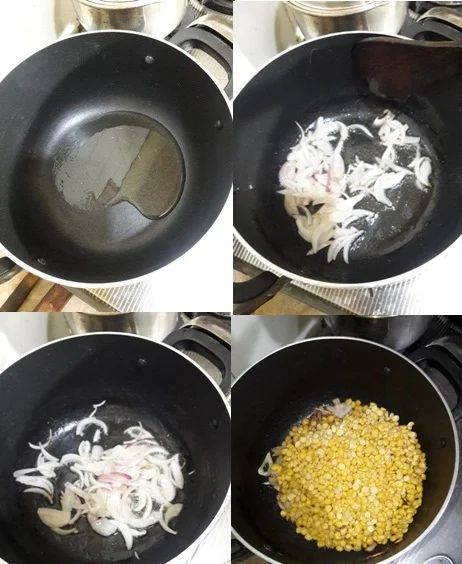
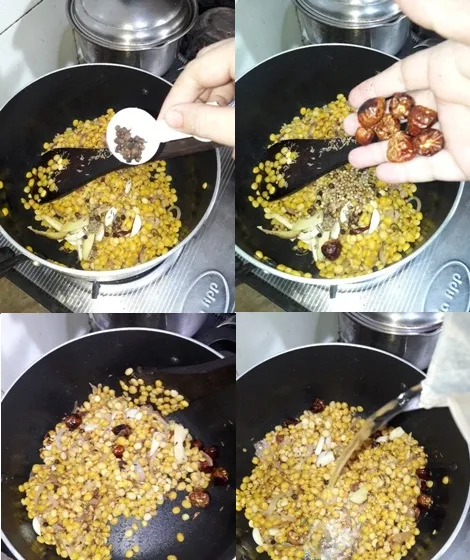
Heat the oil in the pot and sautรฉ the onion for 3-4 minutes on medium flame, Add soaked chana dal into the pot


saut-the-onion

Fry chana dal with onion for 2 minutes on medium flame

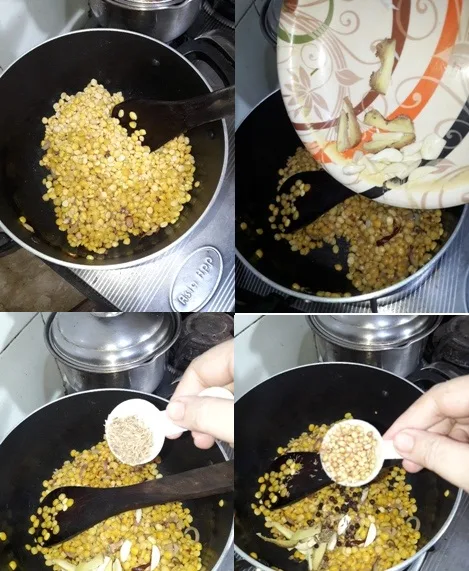
Next, add chopped ginger-garlic, cumin, and coriander seeds


fry-dal-with-onion

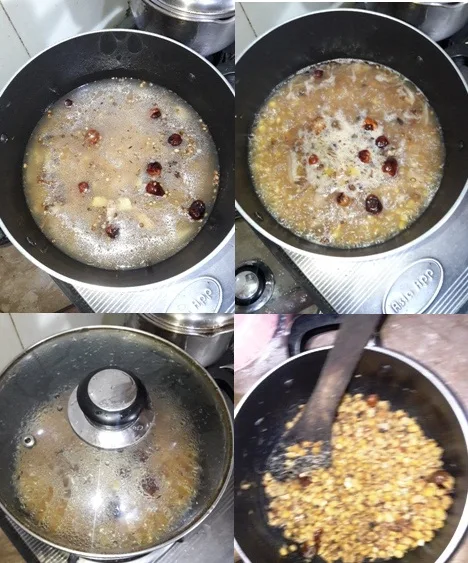
Add black peppercorns, dry red chili, and salt, Stir to mix well, and pour water into the pot


add-spices-to-the-dal

Bring it to a boil and cook until the dal gets soft and the water dries out 


cook-the-dal


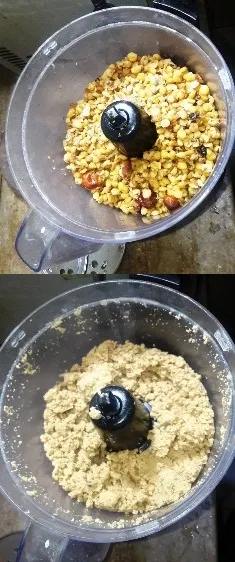
Once the dal gets dry put it into the food processor and grind it all to a fine paste


blend-the-dal

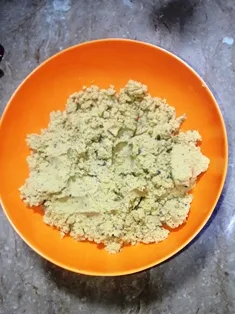
Take the outground dal into the mixing bowl


take-out-ground-dal

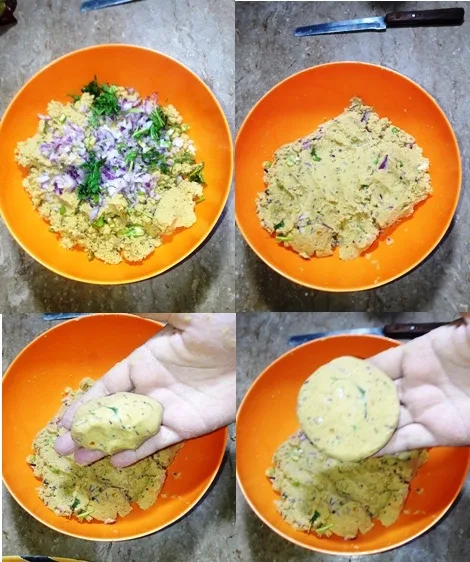
Add chopped onion. coriander and green chilies to the ground dal, Mix up well with the help of a hand, At this stage adjust the salt if needed, And make the equal desirable size of kababs          


mix-dal-and-make-kababs

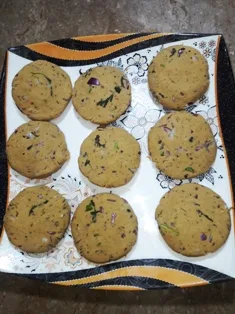
Prepare all kababs, I made 9 medium-size kababs in 1/12 cup chana dal, You can freeze the kababs for more than two weeks 


prepare-all-kababs


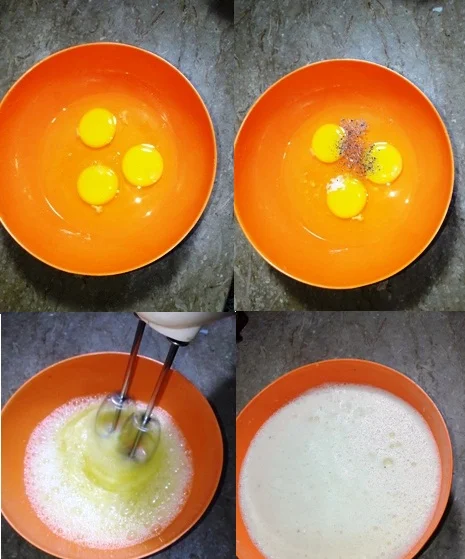
Crack the eggs into another bowl. Add black pepper and salt. Beat them with an electric beater until they turn foamy and stiffly beaten, Set aside 


beat-the-egg


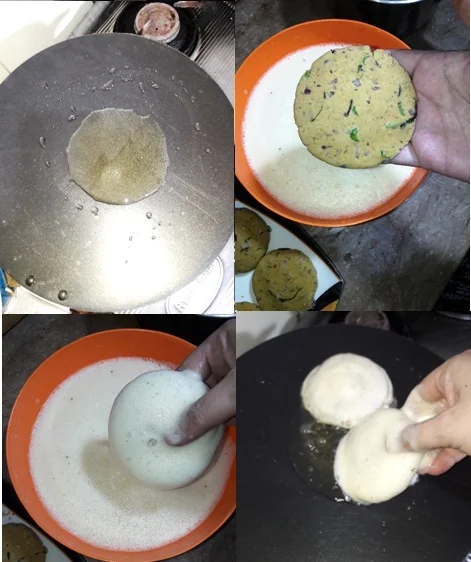
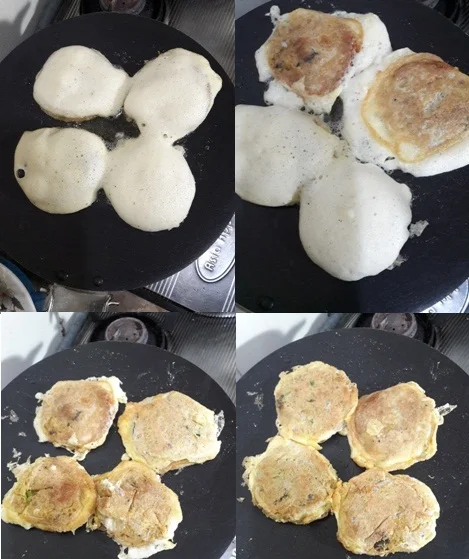
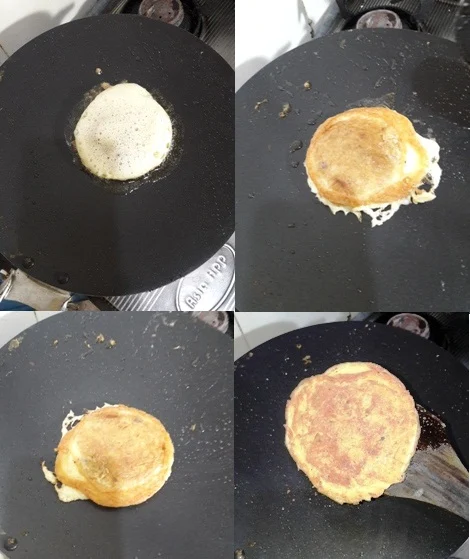
Heat the ghee on the skillet/pan and Dip the kabab in stiffly beaten eggs. Place on the skillet/frying pan


dip-the-kababs-in-stiffly-beaten-egg

And fry them from both sides until they get nicely golden brown. Fry 3-4 kababs in one batch


fry-kabab-until-golden

But as per my experience, these kababs are well fried when is fried it just one


fry-kabab

Fry all kababs as needed 


fry-all-kababs


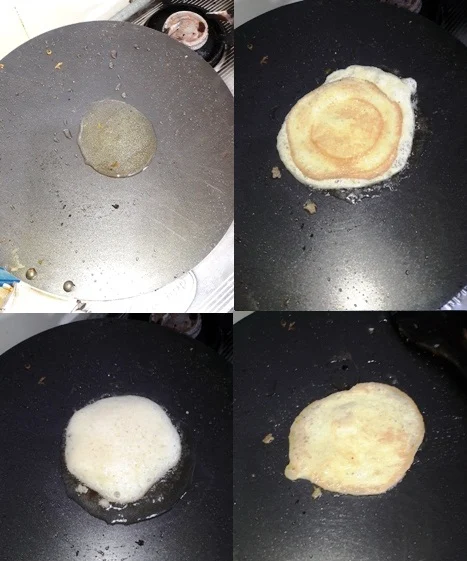
Heat the ghee in the skillet/pan, And fry the omelet around 2 inches in round


fry-omelet


Fry all omelets as needed
           
prepare-all-omelet

Cut buns into half


cut the buns

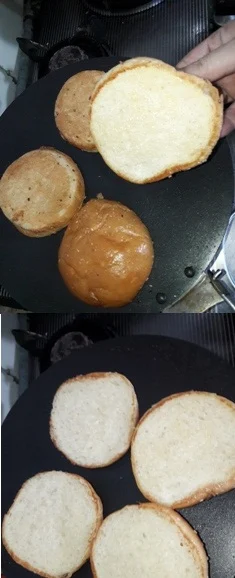
Toast the bun slices in some of the butter on low heat as the high flame may burn the bun burgers


toast-the-buns

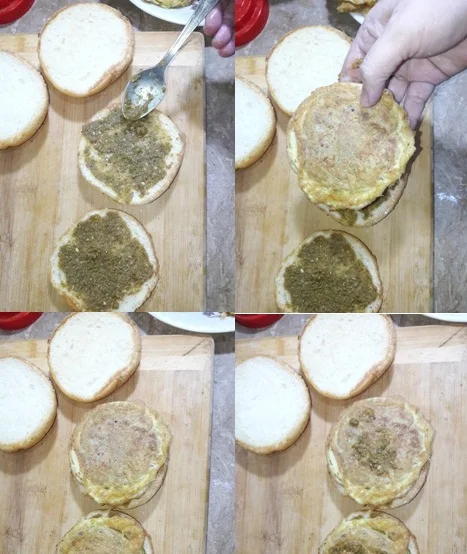
Place 2 bun slices on the board, Next, spread some green chutney over the bun slices then place fried dal kabab, Add more chutney on the buns as desired


spread-the-chutney-and-place-kabab-on-top-of-the-buns


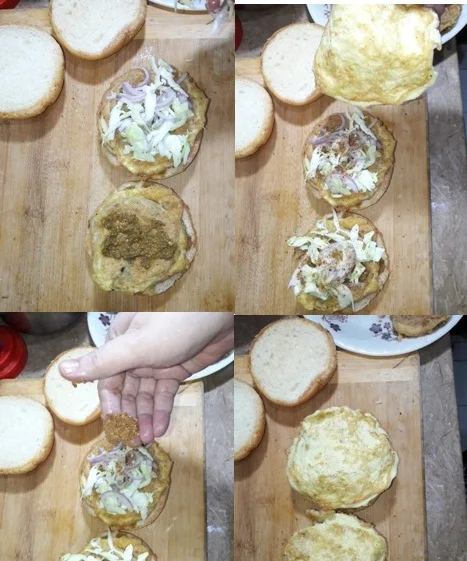
Next, add some onion and cabbage on top of the kababs and sprinkle some chaat masala over the salad then place the omelet


add-salad-on-bun

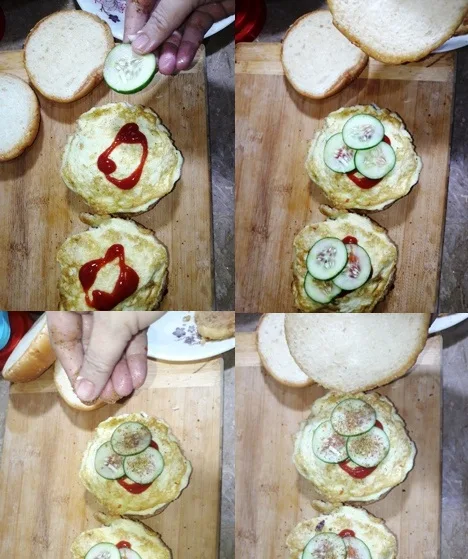
Towards the end drizzle some ketchup and place some cucumber slices along with sprinkling chaat masala further


add-ketchup-and-cucumber-slices

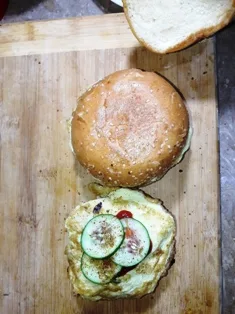
Top with another half of the bun slice


top-with-another-bun

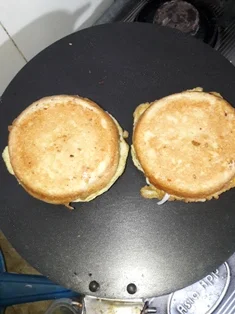
Toast the bun kabab again on the medium-hot skillet


toast-bun-kababs

To the very low flame from both sides


toast-bun-from-both-sides


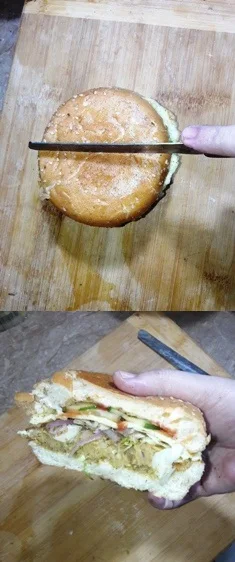
Cut the bun kababs into half


cut the buns

Transfer the anda bun kababs to the serving plate


transfer-the-bun-kababs-to-the-serving-plate

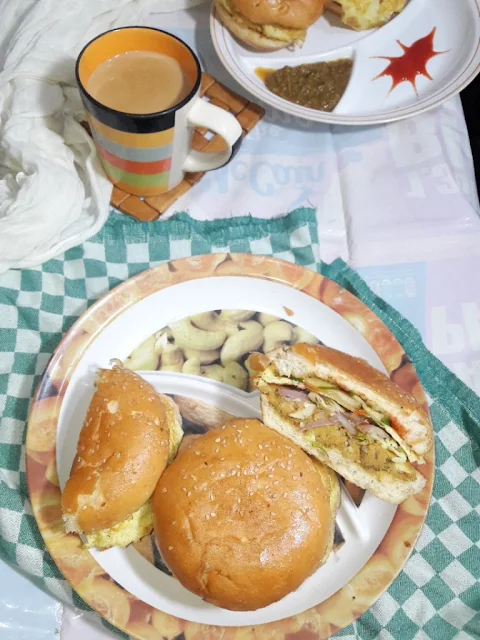
Anda bun kababs are ready to serve, Served hot with tea chutney, and ketchup


bun-kabab-is-ready-to-serve


You can see how it looks delicious dal anda bun


you-can-see-ho-is-looking-delicious-bun-kabab

Followers

Follow